
Plants absorb nutrients through their root hairs. These nutrients include macro or major nutrients and micro / minor / trace nutrients. The macro nutrients include ;nitrogen, phosphorus, potassium, calcium, magnesium and sulphur. The micro nutrients include; iron, copper, zinc, manganese, boron, sodium, chlorine and molybdenum.
Nutrient content requirement per plant varies from one plant to another. And also the critical limit of nutrient required by plants also differs. When a deficiency of a specific nutrient occurs in the soil, this is reflected as a deficiency symptom on the plant parts. Therefore, it is important to know the nutrient status of the soil before planting of crops. When crops are planted, the crop becomes an indicator for deficiency of nutrient.
In addition, the nutritional status of plants can be diagnosis using the following : chemical foliar analysis, biochemical tests, measurements of leaf green color and visual observation
Plant analysis is one of the basic tools for diagnosing soil fertility. To give an accurate information about the nutrient Status of the soil, soil testing and plant analysis are required.
Plant analysis by defination is the quantitative determination of the elements in plant tissue. Carbon, hydrogen, and oxygen are not analyzed routinely because they come from air or water and virtually never limit plant growth. Chlorine is normally sufficient under field conditions, but it may become excessive in saline soils.
Plant analysis complement soil test in determination of soil nutrient status. It is used to confirm a specific nutrient deficiency after observation of the symptoms shown by the plant. It is used for soil fertility assessment. It is based on the principle that the concentration of an element or nutrient within the plant or one of its parts is an integral value of all of the factors that have interacted to affect plant growth, including the availability of the element.
Plant analysis differ from soil analysis. The
difference between soil test and plant analysis is that soil testing is used to assess and predict nutrient availability in the soil, whereas plant analysis is used to assess nutrient uptake by the plant.” Soil test labs calibrate their chemical analysis with crop response in the field.
SOIL FERTILITY ASSESSMENT.
To assess soil fertility based on plant analysis, the following steps are involved.
A. Sample collection
B. Sample preparation
C. Laboratory analysis
D. Interpretation of analysis
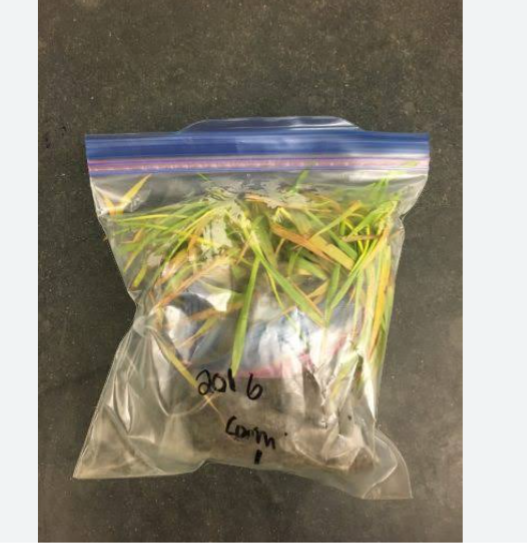
A. SAMPLE COLLECTION: Plant samples are collected as representative of the plant on the field. Due to the fact that variability exist between plant, the number of leaves from plant to sample depend on the variation. The following parts of the plant are collected as samples; leaves, roots, stems, straw, and plant sap. But the leaves are the most appropriate part of the plant to sample.
SAMPLING AND COLLECTION
The following factors are used for obtaining a representative plant sample:
i. Location
ii. Maturity
iii. Time of sampling
i. LOCATION: Plants samples should be take from
matured leaves located just below the growing tip of the branches and stem. This is because the composition of nutrient at these areas are stable compared to younger leaves just being produced.
ii. MATURTY: The composition of nutrients in plant also vary considerably with maturity. Therefore, samples should be taken when the relationship between plant nutrient concentration, plant physical appearance and yield are optimal over a long period. Samples should best be collected from plant when the plant has not reached reproductive stage. It should be taken just before the reproductive stage. When plants begin to develop fruits or seeds, the concentration of nutrients in the vegetative parts changes. Also, sampling after pollination is not recommended. Plants subjected to stress over a long period should not be used for sample collection. This is because the plant would develop nutrient concentration that is misleading. Sampling is not recommended if the plant is covered with dust, injured or diseased.
iii. TIME OF SAMPLING: Sampling of plant part should be carried out when the plant show any sign of symptoms. Or when a nutrient deficiency is suspected. Samples should be taken from similar plants within thesame area. This help aid the interpretation of the analysis.
The sampling procedure must conform to the recommended procedure or else, the interpretation of the analysis result will be difficult or impossible. After the analysis, the assay results should be compared with the known interpretative values. The number of plants to sample in a particular situation depends on the general condition of the plants, soil homogeneity and the purpose for which the analysis will be used.
B. SAMPLE PREPARATION: The following are preparatory steps to follow before analysing the samples in the laboratory.
a. Cleaning
b. Drying
c. Grinding
d. Storage
a. CLEANING: Most of the collected plant materials are usually covered with films of dust. This must be removed before any analysis is carried out. The dust particles can be removed by washing the tissues with 0.1 to 0.3% solution of detergent. After which they should be rinsed in pure water. This will prevent leaching of nutrients such as sodium, potassium and calcium.
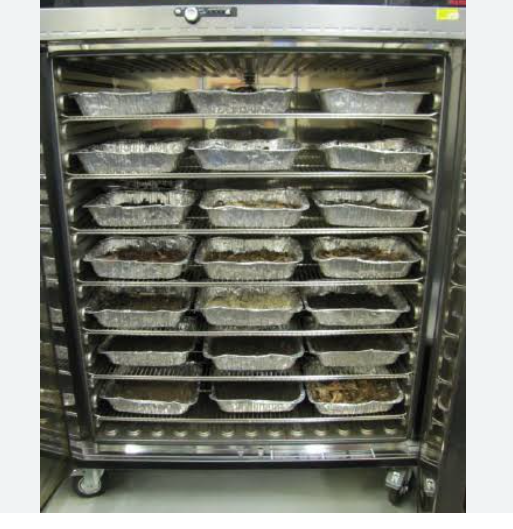
b. DRYING: After cleaning, the materials should be dried. The plant tissues should be dried rapidly as possible so as to minimize any chemical or biological changes. Drying should be done in an oven at 65 °C for 24 to 48 hours. After drying, the sample is ready for grounding
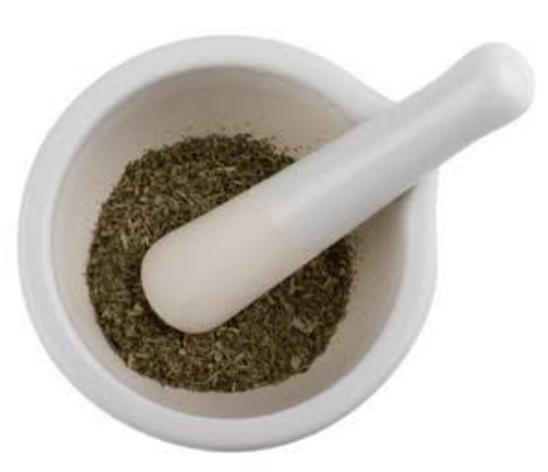
c. GRINDING : Grinding equipment should have a grinding surface made of either steel or stainless steel to prevent contamination. Ginding is important because it allows the sample to be easily manipulated and also it ensures greater uniformity in terms of composition.
d. STORAGE: When samples are poorly dried, mould will develop on them. Samples to be stored for a long period of time should be stored in the refrigerator at a temperature of – 5 °C or lower.
D. LABORATORY METHODS OF PLANT SAMPLE ANALYSIS.
Several methods are used for plant tissue analysis. Most procedures involve washing of tissues to destroy the organic components, the elements for analysis are left on touched. These elements are present as constituents of the plant tissues rather than water soluble, inorganic anions and cations. The organic matter destruction must be accompanied by either dry or wet washing.
WET ARSHING: This is a way of decomposing the plant tissues by digesting the sample in strong acid solution like HNO3, H2SO4 and HClO4 (perchloric acid). The wet digestion is more preferred for analysis of micro elements and elements that could be lost by volatilization ( for example, nitrogen, chlorine and sulphur) in dry washing procedure.
The wet digestion is not suitable for boron analysis because boron can be lost by steam distillation using H3BO3. Also H3PO4 should not be used during perchloric digestion to analyse phosphorus as phosphorus easily volatilize.
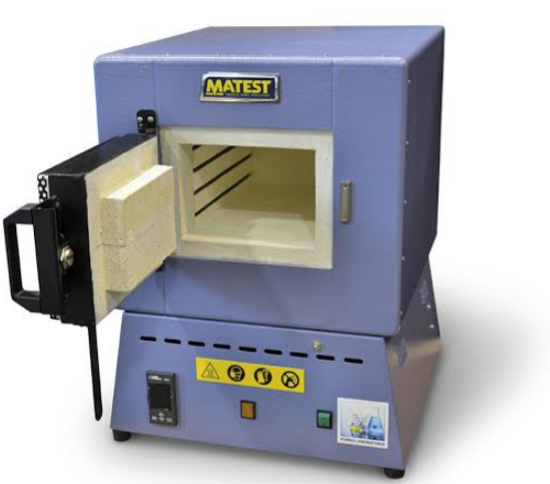
DRY ASHING: Dry ashing involve to the use of a muffle furnace capable of maintaining temperatures of 500–600°C. The sample is heated to this high temperature to burn off the carbon, vapourize water and volatiles, and burn off the organic substances in the presence of oxygen in air to CO2 and oxides of N2. Most minerals are converted to oxides, sulfates, phosphates, chlorides, and silicates.
The heating of the sample must be gradually slow and not rapid as rapid heating can result into the sample bursting into flame.
REASONS TO AVOID HIGH TEMPERATURE DURING DRY ASHING
a. Potassium, sodium, phosphorus, chlorine, sulphur and Boron can be lost due to volatilization.
b. High temperature might fuse salt present in the ash and form a fine mass and surround the particles of partially burnt tissues.
c. Complex silicates might form silicious residues in the shed materials. Such residues usually contain significant amount of trace elements
ADVANTAGES OF ASHING
1. It has ability to decompose large sample sizes.
2. It requires little or no reagents.
3. The technique is relatively safe.
4. It makes it possible to prepare samples containing volatile combustion elements such as sulfur, fluorine and chlorine
5. The technique can be used for mass production.
DISADVANTAGES OF ASHING
1. Losses can occur due to retention to the ashing container.
2. Losses can also occur due to volatilization.
3. The ashing containers can contaminate the sample
4. Contamination can also be from the muffle furnace.
5. Toxic gases may be formed in poorly ventilated areas.
METHOD USED IN ESTIMATION OF PLANT SAMPLE ANALYSIS
After digestion, the nutrients present in the plant parts are estimated. The method used for estimation include:
NUTRIENT. METHOD OF ESTIMATION
ELEMENT
i. Total N. Kjeldahl or dumas method
ii. Total P. Spectrophotometric vanadium
Phosphomolybdate method
iii. Potassium. Flame photo meter or AAS
method
iv. Total S. Turbidometric or LECO sulphur
analyser method
v. Calcium. AAS or EDTA titration method
vi. Magnesium. AAS or EDTA titration method
vii. Micronutrients AAS method
INTERPRETATION OF RESULT
The critical level and nutrient sufficiency range of crops have already being established. Results from the plant tissue analysis are compared with these standard to give interpretation of the analysis result. After the interpretation and identification of the low or deficient nutrient, fertilizer recommendation is then made.
The critical level can be defined as “that nutrient concentration below which yields decrease or deficiency symptoms appear.”
IMPORTANCE OF PLANT ANALYSIS
1. It is used to confirm nutrient deficiency, nutrient imbalance and toxicity level
2. It is used to evaluate fertilizer programme
3. It is used to identify hidden hunger
4. It is used to analyse nutrient interaction in plants etc
In conclusion, the results of plant analysis alone cannot be used to make fertilizer recommendations. Plant analysis can only provide additional information, but should be accompanied by soil testing with soil sample taken from the same area for analysis. Therefore, to give an accurate and reliable information about the nutrient status of the soil, soil test, plant analysis and visual observation of deficiency nutrient should be carried out.